Why is my camera not sending pictures or not connecting?
Solutions for the CLOM Cam 5/6 and icucam 5
Here are steps to check:
- Is image transmission switched on?
In the icuapp or under https://enter.icuserver.com/account/cameras you can switch picture sending on and off.
(Sometimes it happens that this function is pressed by mistake when logging on to the camera) - Is there a memory card with max. 128GB in the camera?
If necessary, format the memory card with the camera: Camera menu -> Settings -> Format SD card - Important: Afterwards, make a Resetto correct any inappropriate settings:
Camera menu-> Settings-> Reset camera - Switch off the camera.
- Check that the antenna is screwed on securely.
- Slide the switch to SETUP and wait up to 3 minutes without pressing a button.
- Repeat this process if you do not receive a connection.
The connection is successful if 4G/3G or 2G is positioned above the antenna bar. - If a connection is established ("Connection OK"), wait until the message "Status OK" or "Status message successful" appears.
Registration of the camera is then complete. - Take a test photo.
Press the right arrow button to create a test photo, which is immediately sent to your icuapp and to https://enter.icuserver.com/account/photos is sent. - If the status message (8.) does not appear, please carry out a firmware update.
You can find the instructions here: icucam 5 - Firmware Update - Then please follow the points again. 4 to 9.
Solution did not help?
There is a much simpler way: Follow these four simple steps and all your contact details, camera information etc. will be pre-filled. This means we can process your enquiry more quickly and have all the data we need.

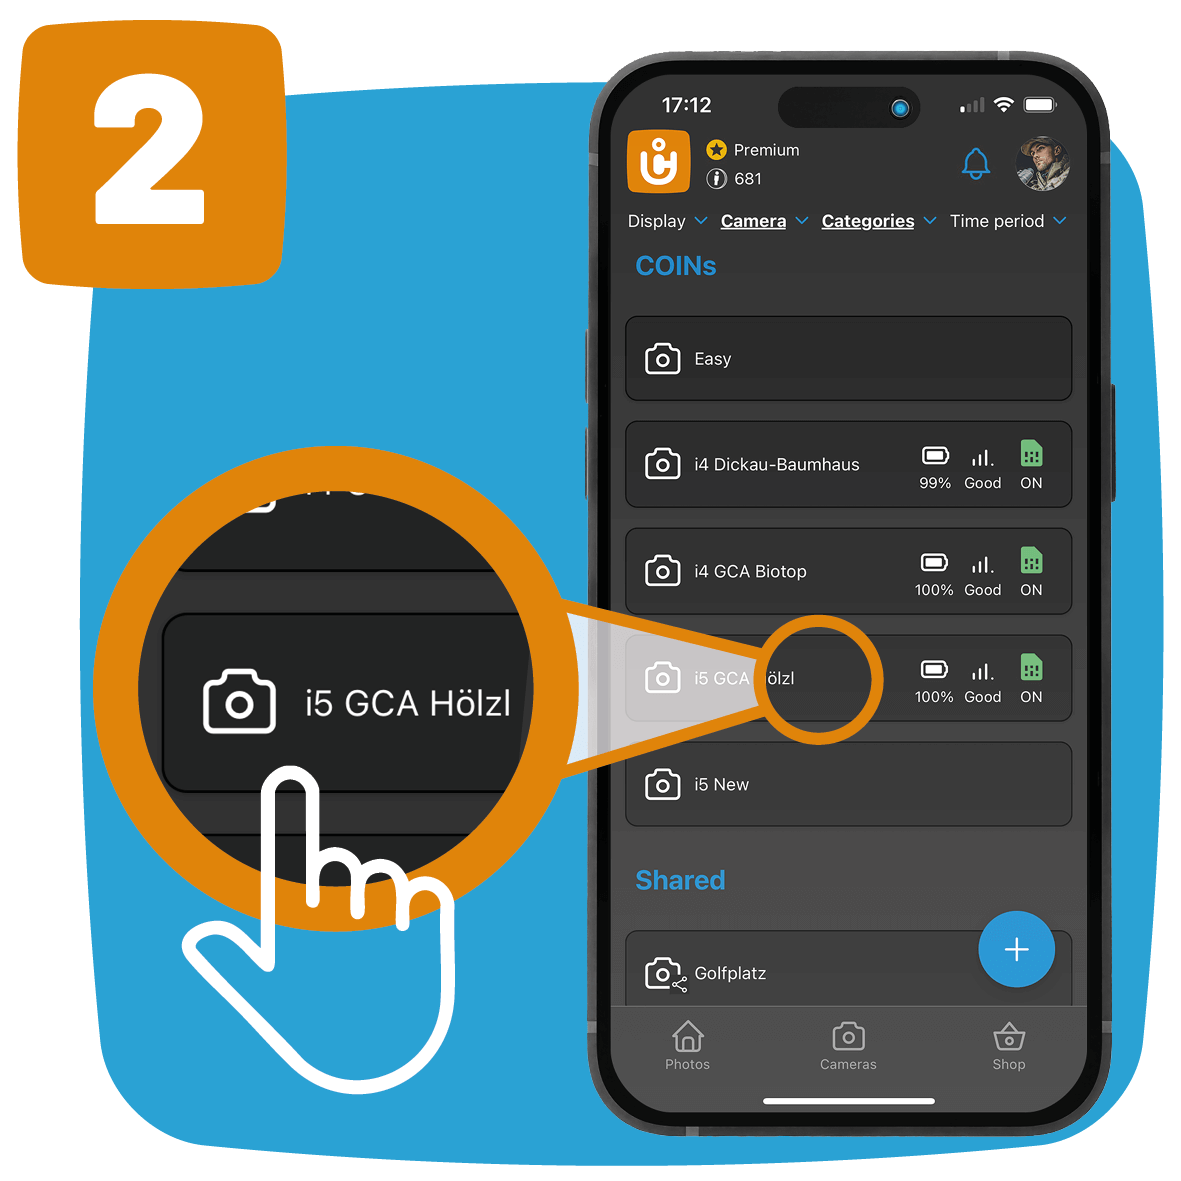
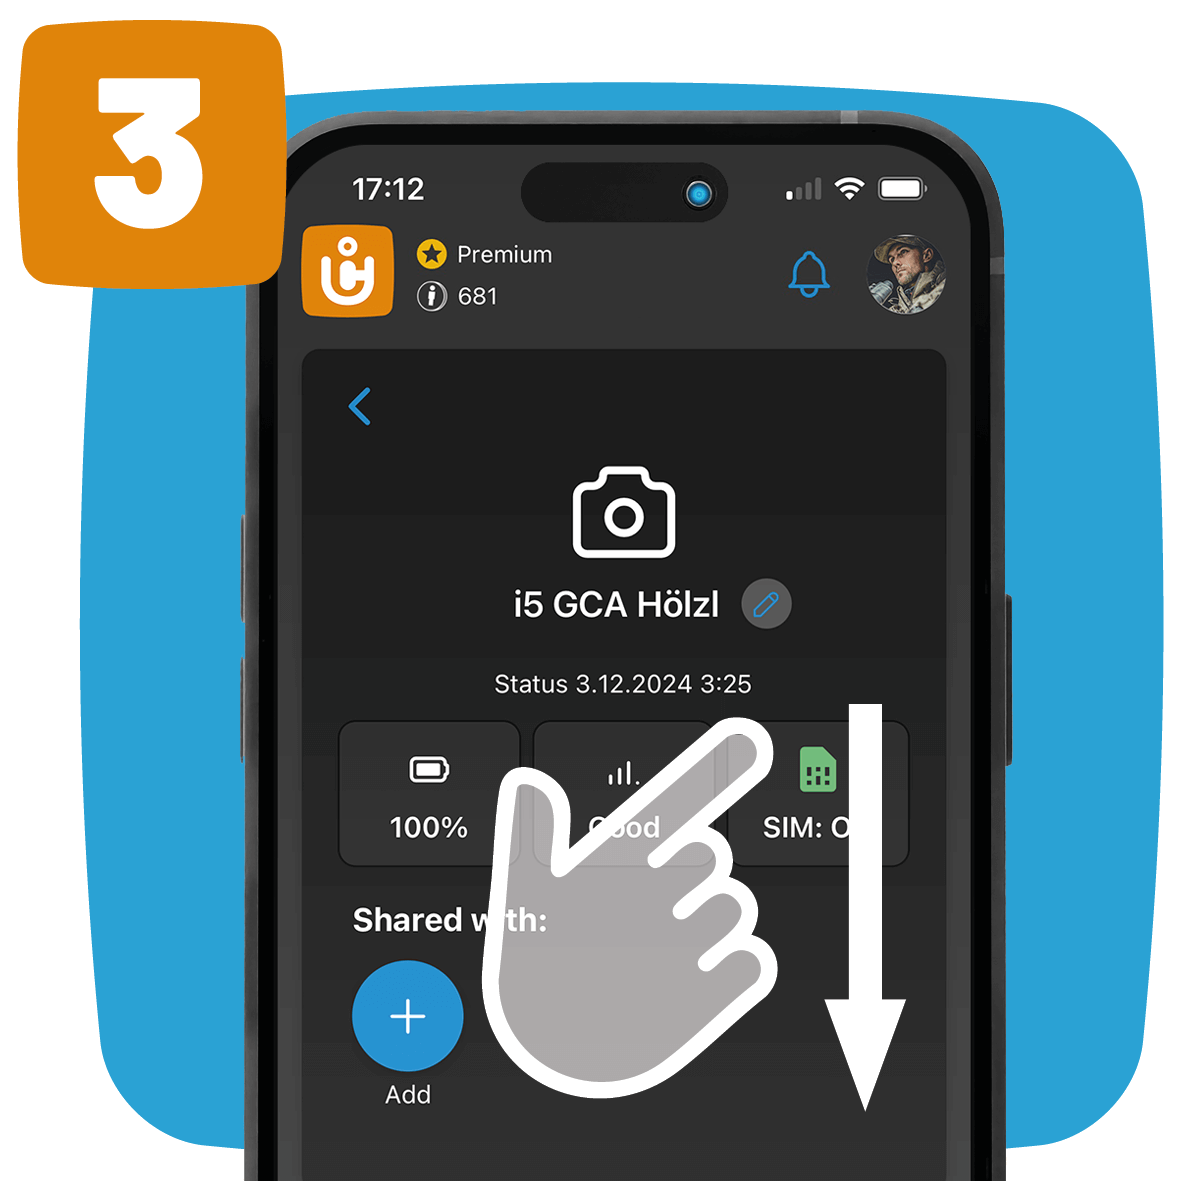
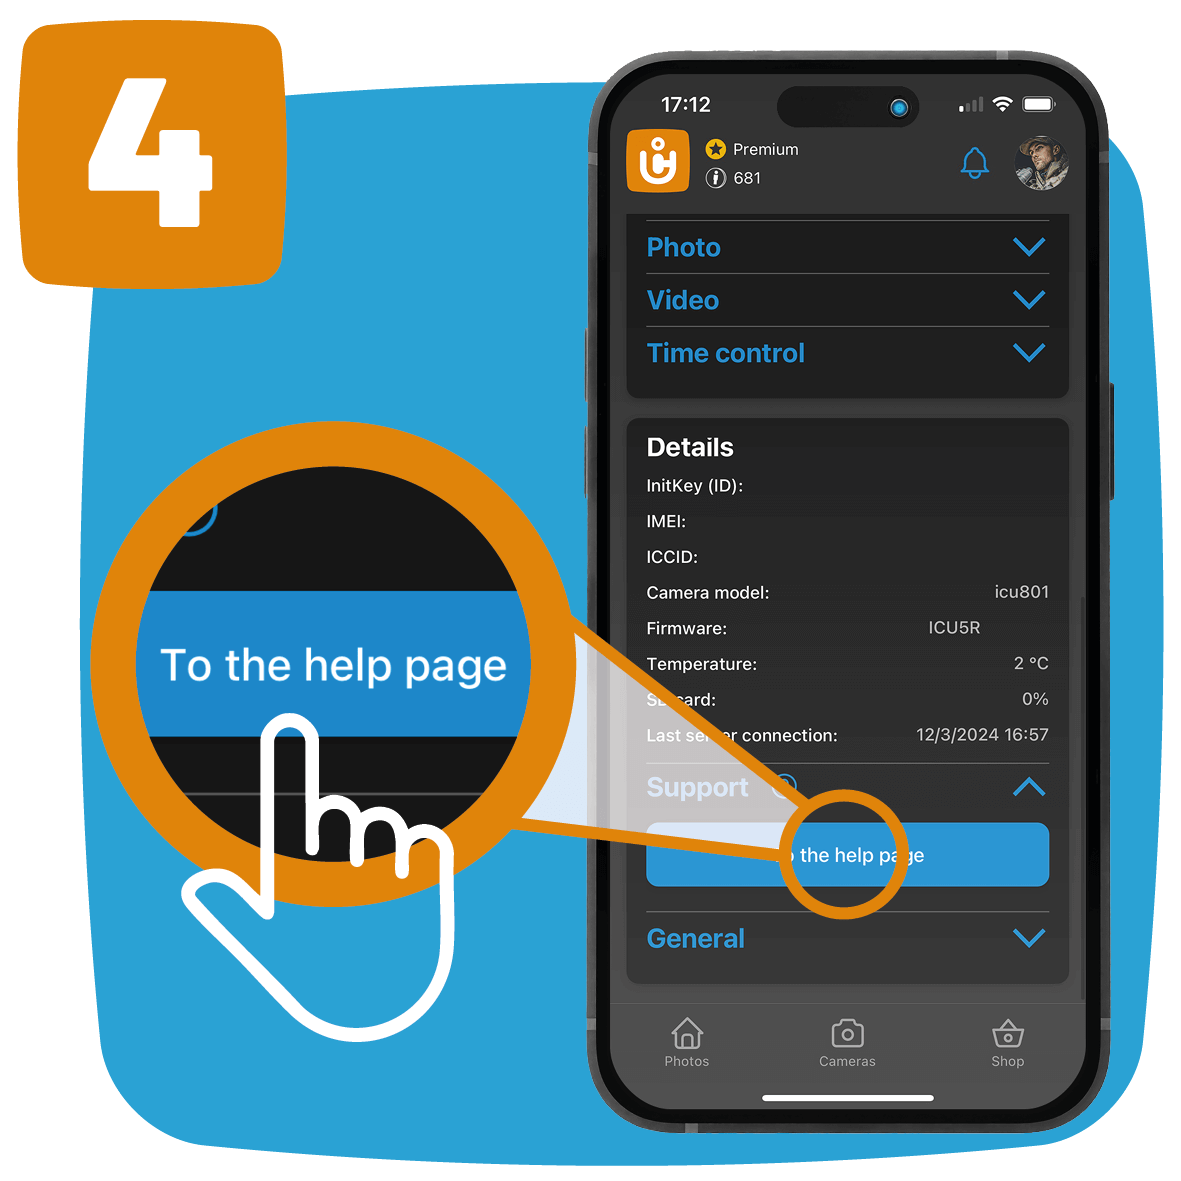
...or Contact us "
Solutions for the icucam4
Here are steps to check:
- Is image transmission switched on?
In the icuapp or under https://enter.icuserver.com/account/cameras you can switch picture sending on and off.
(Sometimes it happens that this function is pressed by mistake when logging on to the camera) - Is there a memory card with max. 32GB in the camera?
If necessary, format the memory card with the camera: Camera menu -> Settings -> Format SD card - Important: Afterwards, make a Resetto correct any inappropriate settings:
Camera menu-> Settings-> Reset camera - Switch off the camera.
- Check that the antenna is screwed on securely.
- Slide the switch to SETUP and wait up to 3 minutes without pressing a button.
- Repeat this process if you do not receive a connection.
The connection is successful if 4G/3G or 2G is positioned above the antenna bar. - If a connection is established ("Connection OK"), wait until the message "Status OK" or "Status message successful" appears.
Registration of the camera is then complete. - Take a test photo.
Press the right arrow button to create a test photo, which is immediately sent to your icuapp and to https://enter.icuserver.com/account/photos is sent. - If the status message (8.) does not appear, please carry out a firmware update.
You can find the instructions here: icucam 4 - Firmware Update - Then please follow the points again. 4 to 9.
Solution did not help?
There is a much simpler way: Follow these four simple steps and all your contact details, camera information etc. will be pre-filled. This means we can process your enquiry more quickly and have all the data we need.
...or Contact us "
Solutions for the icucam lite
Here are steps to check:
- Is image transmission switched on?
In the icuapp or under https://enter.icuserver.com/account/cameras you can switch picture sending on and off.
(Sometimes it happens that this function is pressed by mistake when logging on to the camera) - Is there a memory card with max. 32GB in the camera?
If necessary, format the memory card with the camera: Camera menu -> Settings -> Format SD card - Important: Afterwards, make a Reset, to correct any inappropriate settings:
Camera menu-> Settings-> Reset camera - Switch off the camera.
- Check that the antenna is screwed on securely.
- Slide the switch to SETUP and wait up to 3 minutes without pressing a button.
- Repeat this process if you do not receive a connection.
The connection is successful if 4G/3G or 2G is positioned above the antenna bar. - If a connection is established ("Connection OK"), wait until the message "Status OK" or "Status message successful" appears. Registration of the camera is then complete.
- Take a test photo. Press the right arrow button to create a test photo, which is immediately sent to https://enter.icuserver.com/account/photos is sent.
- If the status message (8.) does not appear, please carry out a firmware update.
You can find the instructions here: icucam lite - Firmware Update - Then please follow points 4 to 9 again.
Solution did not help?
There is a much simpler way: Follow these four simple steps and all your contact details, camera information etc. will be pre-filled. This means we can process your enquiry more quickly and have all the data we need.
...or Contact us "
Solutions for the icuhunt/icutrap
Here are steps to check:
- Activate image dispatch (if not already active)
- Switch on the camera
Wait until it has a signal. - Then in the menu under "Other" Perform a "Reset".
- Switch off the camera
- Switch back to "Setup"
Wait until there is a signal (can take a very long time, up to 3 minutes)
The camera may switch off. By pressing the button regularly
(e.g. menu every 20 seconds) this can be prevented. - Then press "OK"
- Now a picture should be taken and sent: "send smtp". If "Send successful" appears, then everything is OK.
- If "no signal" appears, repeat the process two to three times.
Solution did not help?
There is a much simpler way: Follow these four simple steps and all your contact details, camera information etc. will be pre-filled. This means we can process your enquiry more quickly and have all the data we need.
...or Contact us "
Solutions for the 3G camera simHERO
Here are steps to check:
Please note the information on the Test procedure screen:
- Batteries full?
- Set the camera switches to the following position:
"ON" / photo symbol / "25" or "56" / "ON" - Then switch on and briefly (!) press the "OK" button until the screen appears.
- When the screen is active, take a photo by pressing the "OK" button once
-> It then takes one to two seconds for the photo to start being sent. - Please note the screen now. If the photo has been sent correctly ("Send SMTP" message), this will be confirmed on the screen ("Sending successful"). The duration of the sending process depends on the quality of the mobile phone network reception. (normally 30 seconds)
Appears Error 500then there is a problem with the mavoco SIM card. In this case, please contact the SIM card operator mavoco/SimHero: www.simHERO.com or via help@simHERO.com.
In the event of other error messages or NO MESSAGES, carry out the reset shown:
You can also find additional information here: Camera reset.pdf
Please note:
- The file name (MMS.cfg) must not be changed.
- The name must correspond exactly to "MMS.cfg"! e.g. MMS(1).cfg, MMS(2) or similar would be incorrect and the reset would not work.
- The file must be saved to the top level of the SD card, i.e. please do not save it in a file folder.
Solution did not help?
There is a much simpler way: Follow these four simple steps and all your contact details, camera information etc. will be pre-filled. This means we can process your enquiry more quickly and have all the data we need.
...or Contact us "
Solutions for the CLOM EasyCam and icueasy
Here are steps to check:
- Is image transmission switched on?
In the icuapp or under https://enter.icuserver.com/account/cameras you can switch picture sending on and off.
(Sometimes it happens that this function is pressed by mistake when logging on to the camera) - Is there a memory card with max. 32GB in the camera?
If necessary, format the memory card with the camera: Camera menu -> Settings -> Format SD card - Important: Afterwards, make a Resetto correct any inappropriate settings:
Camera menu-> Settings-> Reset camera - Switch off the camera.
- Check that the antenna is screwed on securely.
- Slide the switch to SETUP and wait up to 3 minutes without pressing a button.
- Repeat this process if you do not receive a connection.
The connection is successful if 4G/3G or 2G is positioned above the antenna bar. - If a connection is established ("Connection OK"), wait until the message "Status OK" or "Status message successful" appears.
Registration of the camera is then complete. - Take a test photo.
Press the right arrow button to create a test photo, which is immediately sent to your icuapp and to https://enter.icuserver.com/account/photos is sent. - If the status message (8.) does not appear, please carry out a firmware update.
You can find the instructions here: icueasy - Firmware Update - Then please follow the points again. 4 to 9.
Solution did not help?
There is a much simpler way: Follow these four simple steps and all your contact details, camera information etc. will be pre-filled. This means we can process your enquiry more quickly and have all the data we need.
...or Contact us "
Solutions for the CLOM Cam-S
Here are steps to check:
The Cam S offers three different subscriptions: Silver, Gold and Platinum. Details of the individual You can find Simple Plan subscriptions here
If your camera is not sending any pictures despite an active subscription, this may be due to the following causes:
a) Maximum number of images reached
Each subscription has a fixed number of images per 30-day cycle. As soon as this number is reached, image dispatch stops automatically.
> Check in the camera view of the app whether you have reached your picture limit.
> If the limit has been reached, you can upgrade to a higher subscription at any time to continue sending pictures.
b) Silver subscription expired or used up
The Silver subscription is a free basic subscription that must be reactivated manually after 30 days. If your subscription has expired or the picture quota has been used up, the SIM card will be deactivated.
> Check in the "App -> Camera settings" whether your Silver subscription is still active.
> If it has expired, reactivate it manually to continue sending images.
c) Platinum subscription active, but camera triggers irregularly?
If you have a Platinum subscription and your camera only triggers with a delay, this could be due to the fair use principle. The Platinum subscription offers unlimited image sending, but after 2,000 images have been sent, the trigger interval is increased to 10 minutes. This means that your camera pauses for 10 minutes after each image capture before taking a new image.
> If you have already sent over 2,000 images in a cycle, you can continue to receive images - but with a longer interval between shots.
> This regulation serves to ensure fair use for all users.
d) If none of these points apply and your camera is still not sending any images, please check the following points:
- Is there a memory card with max. 128GB in the camera?
If necessary, format the memory card with the camera: Camera menu -> Settings -> Format SD card - Important: Afterwards, make a Resetto correct any inappropriate settings:
Camera menu-> Settings-> Reset camera - Switch off the camera.
- Check that the antenna is screwed on securely.
- Slide the switch to SETUP and wait up to 3 minutes without pressing a button.
- Repeat this process if you do not receive a connection.
The connection is successful if 4G/3G or 2G is positioned above the antenna bar. - If a connection is established ("Connection OK"), wait until the message "Status OK" or "Status message successful" appears.
Registration of the camera is then complete. - Take a test photo.
Press the right arrow button to create a test photo, which is immediately sent to your icuapp and to https://enter.icuserver.com/account/photos is sent. - If the status message (8.) does not appear, please carry out a firmware update.
You can find the instructions here: CLOM Cam-S - Firmware update - Then please follow the points again. 4 to 9.
Solution did not help?
There is a much simpler way: Follow these four simple steps and all your contact details, camera information etc. will be pre-filled. This means we can process your enquiry more quickly and have all the data we need.
...or Contact us "